


Install LED Lights for a Stylish Car Interior Upgrade
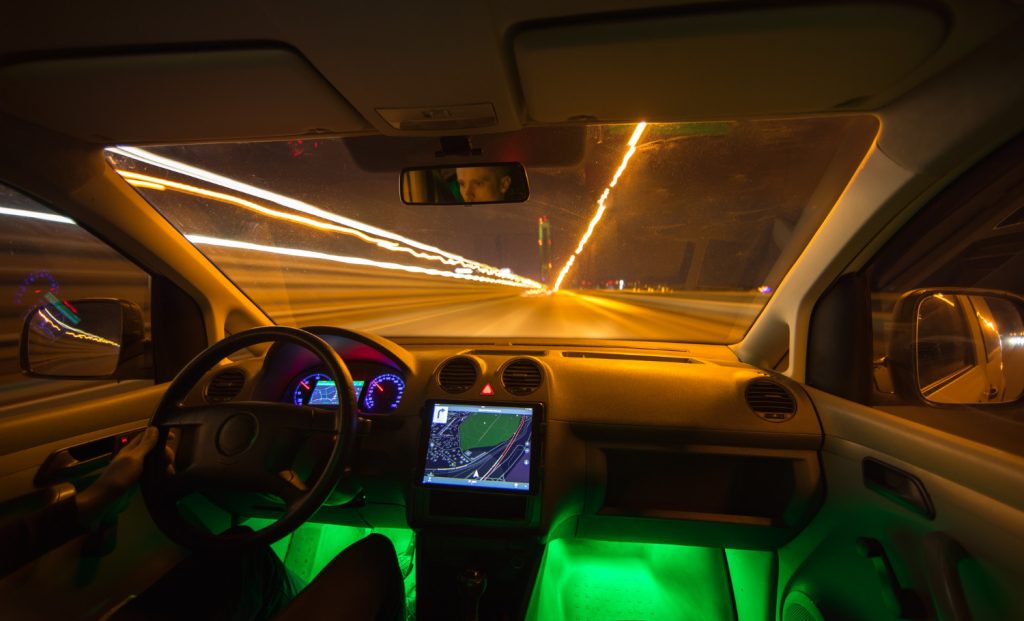
Hey there, fellow car enthusiasts! Picture this: you’re cruising down the road on a moonlit night, your car’s interior bathed in a mesmerizing glow of vibrant colours. It’s not a scene from a sci-fi movie; it’s your reality with LED lights installed in your car. If you’ve ever wondered how to transform your car’s interior into a stylish haven of light, you’re in the right place. Today, we’ll dive into installing LED lights for that ultimate car interior upgrade.
Why LED Lights?
Before we get into the nitty-gritty of installation, let’s talk about why LED lights are the go-to choice for many car enthusiasts. First, they’re energy-efficient and won’t drain your car’s battery. Plus, LEDs are incredibly versatile, offering various colours and brightness levels to suit your mood. LEDs have you covered whether you want a relaxing ambience or a vibrant party atmosphere.
Where to Install LED Lights
Now, let’s discuss the fun part—deciding where to install your LED lights. The possibilities are endless! You can place them under the dashboard, along the door panels, or in the footwells. Some car owners opt for LED strips along the edges of the seats or on the ceiling for a celestial effect. The choice is yours, depending on the vibe you want to create inside your car.
Tools You’ll Need
Before we jump into the installation process, let’s gather our tools. You’ll need a few essentials, including LED light strips (make sure they’re the correct length for your chosen locations), a control unit or remote, adhesive clips or double-sided tape, and a few zip ties to tidy those cables. Don’t worry; this isn’t an automotive engineering project; it’s a DIY upgrade anyone can handle.
The Installation Process
- Prepare Your Workspace: First, ensure your car is parked in a safe, well-lit area. You don’t want to be fumbling in the dark.
- Measure and Cut: Measure the length of LED strips needed for your chosen locations and cut them accordingly. Most LED strips have cut marks for easy customization.
- Clean the Surface: Before sticking the LED strips, clean the surface thoroughly to ensure the adhesive adheres appropriately.
- Attach the LED Strips: Carefully attach the LED strips to your chosen locations. Start with one end and press firmly as you go along. Use adhesive clips or double-sided tape for added security.
- Connect the Control Unit: Most LED kits have a control unit or remote. Connect it to the LED strips according to the manufacturer’s instructions.
- Tuck Away Cables: Use zip ties to neatly bundle and tuck away any excess cables. You want your installation to look clean and professional.
- Test the Lights: Before sealing everything up, test the lights to ensure they work correctly. Adjust the colours and brightness using the control unit or remote.
- Secure Loose Ends: Once you’re satisfied with the placement and functionality, secure any loose ends and ensure the LEDs won’t interfere with your driving.
Enjoy the Ride
And there you have it, folks—a simple yet impactful way to elevate your car’s interior with LED lights. Whether driving at night, stuck in traffic, or leisurely, your car’s ambience will be on another level. It’s like having a personal light show on the go!
So, what are you waiting for? Grab your LED kit, follow these steps, and get ready to turn heads and create envy-worthy car interior vibes. The road is your canvas, and your car is your masterpiece. Enjoy the ride in style!
Stay tuned to Magque for more DIY tips, car hacks, and everything automotive to fuel your passion for all things on wheels.
Read Also:


